Bike Wheel Truing – Tips and Tricks
There are many things to consider when Bike Wheel Truing.
Some of the many things to consider when truing a bike wheel, including lateral truing, damaged spoke nipples, and dish centering.
We also address the most common problems that bike wheel truing can cause.
Truing a bike wheel is a vital part of bike maintenance.
Here are some tips and tricks to help you perform this task effectively:
- Understand Wheel Anatomy: Before you start, get familiar with the components of a wheel – the hub, spokes, nipples, and rim. This will help you understand what each part does and how they interact.
- Getting the Right Tools: A spoke wrench is the primary tool for wheel truing. Ensure you have the correct size for your bike’s spokes. A truing stand is also useful but not essential.
- Start Small: If you’re new to truing wheels, start with small adjustments. Turn the spoke nipple only a quarter rotation at a time.
- Listen to Your Wheel: Spinning the wheel can help you hear any irregularities. A rubbing or scraping sound usually means that part of the wheel is out of true.
- Check for Loose Spokes: Loose spokes are often a cause of wheels becoming untrue. Check for any loose spokes and tighten them appropriately.
- Alternate Adjustments: When truing, alternate between tightening and loosening spokes. This helps to maintain an even tension throughout the wheel.
- Patience is Key: Wheel truing is a process that requires patience. Don’t rush it, take your time to make precise adjustments.
- Check Your Progress: Regularly check your progress by spinning the wheel in the stand or frame. Look and listen for any wobbles or scrapes.
- Know When to Seek Professional Help: If you’re struggling with truing your wheel, don’t hesitate to seek professional help. A poorly trued wheel can lead to more serious issues down the line.
Remember, practice makes perfect when it comes to wheel truing.
Remember these tips, and you’ll be well on your way to becoming a pro in no time!
Dish centering
A bicycle dish measures the rim’s centering over the hub. If your wheel is slightly out of round, you can use a dish stick to find out.
You can also check the center of your wheel by eyeballing it in your frame.
However, it can still be off-center if you have not yet dished your bike. In that case, you should hire a professional mechanic.
To test the rim’s centering, try repositioning the rim so that the flanges on the left and right sides are centered.
The rim will then sit properly in the bike. This is the best way to test the centering for front-rim brake wheels, while for rear rim brake wheels, the rim must be centered between the forks and the rear triangle. Dish centering is easier to check with a dishing tool than with the naked eye.
Hold the wheel with the right side upward and the left side up to use a dishing tool. The tool will then tell you whether the wheel is centering over the hub.
If you find that the rim plane is not centered in the hub, give it a half-turn carefully.
If the spokes are touching the high spot, turn them down a millimeter and check to ensure that the rim does not rub against the hub. In the end, dishing is very easy.
Just follow these steps carefully to achieve perfect dishing.
And remember that if you don’t want to mess up your bike, you can always contact a professional.
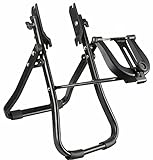
- COMPATIBILITY: Axle compatible with QR, 15 x 100mm & 110mm, 12 x 142mm. ( NOT for 20mm Thru Axle). Accepts wheels from 16″ up to 29” with or without tires. Both front and rear hub could be mounted by switching wheel holders.
- ECONOMIC: Great for light use customers who may only use the truing stand once or twice a year. Please note: This is not a professional level wheel truing stand.
- QUALITY: Truing stand is made of quality steel, and manufactured well. It comes with more comfortable knobs for smooth accurate and easy operation.
- FOLDABLE: Quickly fold the stand for storage when not in use. Foldable to 53cm x 28cm x 6cm. Weight: 1817g = 4lbs.Height: 480mm.
- ORDER NOW, WORRY FREE! We’re so confident about our product quality that we can provide 2-year warranty! Made in Taiwan.
Last update on 2026-08-01 / Affiliate links / Images from Amazon Product Advertising API
Using a truing stand
Using a truing stand for your bike wheels is a great way to get the exact tuck your bicycle wheel needs. While truing wheels is a different process than building them, the end result is the same.
There are a few differences in truing stands. Simpler models are often more compact and easier to clean, while high-quality truing stands are much more accurate.
To get the exact tuck you need, you should make sure to use a stand with enough clearance.
You can use adjustable sensors on a truing stand to find irregularities on the rim. You can buy plastic or metal sensors to see how far the wheel moves.
Springy plastic tips are easier on the rim and avoid scratching it. Professional truing stands often come with dial gauges to ensure precise measurement.
If you’re unsure which model to buy, start by reading the manual.
A bike wheel truing stand is a great tool to use if you’re not a professional mechanic. It allows you to check the rim in any direction, so it’s not prone to hops or other problems.
You can also use a zip tie to hold the stand in place.
A Park Tool TS-8 stand is the best option if you’re working on a budget. A park tool WAG-4 stand is more than enough for most people.
A bike wheel truing stand makes balancing a breeze. If you’re new to the process, be sure to have a spare tire. If your bike wheel truing tool isn’t strong enough, you may end up with a flying spoke.
Luckily, a nipple on each spoke can be used to keep it from slipping out of alignment.
Using a truing stand can make the process of truing your bike wheel much easier.
Here’s a step-by-step guide on how to use one:
- Mount the Wheel: First, remove the wheel from your bike. Then, mount it onto the truing stand. Make sure it is secure and stable.
- Identify the Issue: Spin the wheel slowly. Look for any wobble or hop in the wheel. The truing stand’s calipers will help indicate where the wheel is out of true.
- Adjust the Spokes: Once you’ve identified where the wheel is out of true, use your spoke wrench to adjust the spokes. If the wheel is wobbling to the left, tighten the spokes that lead to the right side of the hub or loosen the ones leading to the left side, and vice versa.
- Check Your Work: After making adjustments, spin the wheel again to check your work. If the wheel still wobbles, repeat the adjustment process.
- Work in Small Increments: Always adjust in small increments. It’s better to make several small adjustments rather than one big one.
- Check Spoke Tension: After you’ve finished truing, squeeze pairs of spokes together to check their tension. They should all feel similar.
Remember, using a truing stand can significantly simplify the process of truing your wheels. It allows for more precise adjustments and easier identification of problem areas on your wheel.

- STABLE STRUCTURE – The product is made of high-quality heavy-duty iron, and is coated with a black protective layer on the outside; To ensure excellent product quality and stable structure, prevent rust and corrosion and extend the service life of the product
- WIDE APPLICABILITY – The wheel centering cone on the central axis can flexibly adjust the space distance, which can be applied to different vehicle and motorcycle wheels on the market and various bicycle wheels; High applicability can solve more problems and save a lot of time and improve work efficiency
- SMOOTH AND SAFE – Wheel centering shaft and ride on 4 bearings to eliminate friction, to ensure stability and safety when balancing wheels; Wheels can be installed and balanced efficiently
- EASY TO USE – Professional motorcycle wheel installation and balancing tool; the operation is very simple, fast and efficient; It can correct motorcycle wheels faster and more accurately,it is an essential tool for repairing and balancing wheels
- ECONOMICAL AND PRACTICAL – An economical tool that can solve most of the problems in the balance of motorcycle wheel installation through simple operations; Economical and efficient, a good helper in life
Last update on 2026-08-01 / Affiliate links / Images from Amazon Product Advertising API
Damaged spoke nipples
If your bike wheel’s spoke nipples are damaged or broken, one of the spokes is likely damaged. This could be due to corrosion or contamination.
Either way, spokes will twist instead of tighten and weaken over time.
One of the best ways to repair damaged spoke nipples is to apply thin oil around the nipple head to loosen the spoke threads.
Spoke nipples are brass or aluminum and must extend through the rim’s head. When damaged, they will break at a point where the spoke runs flush with the head of the nipple.
If the nipple is bent or broken, remove the rim and tire tape to inspect it from the inside.
If your bike wheel has a warranty, the shop should replace damaged nipples.
A damaged nipple on your bike wheel can make it difficult to shift or ride. To fix the nipple, unscrew the spoke stub and pull it out of the spoke nipple.
Make sure the spokes are tightened, but not too tight. Loose spokes can cause the nipple to fall in the rim.
A broken spoke on a bicycle wheel can be a huge nuisance, but you can repair the problem by yourself. First, remove the cassette, then use a spoke key to pry out the broken spoke.
To remove the cassette, turn the lockring anticlockwise. Make sure to put the cassette in a safe place before you start fixing the broken spoke.
Sometimes, you may need to remove the brake rotor to replace the spoke. If you’re using a six-bolt rim, you’ll need a T25 Torx key.
Radial truing
You may need to perform radial truing on your bicycle’s wheels when you ride your bike.
This process can help you get your bike wheel as true as possible.
This process works by rotating the wheel on a truing stand. You will need a truing stand, a wheel, and an indicator to do this.
Using a wheel truing stand, you can adjust the calipers so that the rim is clear of the rim.
You need a spoke wrench with several different sizes and a truing stand to do radial truing on bike wheels.
A truing stand will allow you to do this more accurately.
Make sure to take the chain off the rear wheel. The spokes on the right side of the hub flange will pull the wheel toward the right.
If you have two spokes on either side of the hub flange, tighten those. The remaining spokes should be loose.
You’re ready to adjust the spokes once you’ve finished your initial truing.
A proper radial truing technique will reduce the spoke tension and make your bike wheel straighter. To fix radial deviation, you need to tighten the spokes equally on both sides.
If you have more than one pair of spokes, you’ll need to use a set of pliers to adjust the spokes.
A proper truing machine will allow you to correct your bike wheels.
You can always do it yourself if you don’t want to spend hundreds of dollars on a machine.
But if you’re not confident, consider hiring a professional truing machine to do the job for you.
A truing arm should have indicator zip ties parallel to the rim to help you determine how much adjustment is needed.
Correcting a sagging spoke.
Regarding bike wheel truing, the process starts with locating the spokes. Look for nipples that are located at the rim of the spokes.
Turn these nipples clockwise to tighten and counterclockwise to loosen the spoke tension.
Turn the spoke nipples a quarter to half turn at a time until the desired result is achieved.
A sagging spoke may be caused by several things, including a damaged drive chain, a faulty rear derailleur, or even pedaling too hard.
Some causes are obvious, while others may not be immediately apparent. It is best to have them replaced before they break completely.
You can prevent these problems by taking the necessary preventative measures.

- 360 DEGREE ROTATABLE CLAMP & HEIGHT ADJUSTABLE BODY- Clamp with lever can hold your bike super steady, adjustable height make sure your waist comfortable during work
- DURABLE WELDED IRON – Lighter, no corrosion, easy carry, easy storage, intensity of iron tested can afford max load 60 pounds bike
- TOOL TRAY WITH MAGNET- Big tray has customized place for different tools, more space-efficient, also magnet can collect crews and nuts without missing
- FRONT WHEEL NO SHAKE- Tighten rod included in the package won’t let the front wheel swivel when you are working, the tighten rod is also length adjustable
- SUPER STEADY TRIANGLE BASE WITH RUBBER FEET- Holds bikes steady, rubber feet antiskid and won’t scratch floor
Last update on 2026-08-01 / Affiliate links / Images from Amazon Product Advertising API
Correcting a sagging spoke can be done with a few steps:
- Identify the Sagging Spoke: Rotate the wheel to identify which spoke is sagging. It will typically have less tension than the others.
- Tighten the Spoke: Use a spoke wrench to tighten the spoke. Turn the nipple clockwise to increase the tension. Make sure your wrench is the correct size for your bike’s spokes to avoid stripping the nipples.
- Small Adjustments: It’s important to make small adjustments. Try turning the nipple only a quarter turn at a time.
- Check the Tension: After each adjustment, squeeze the spoke and its neighboring spokes to check the tension. They should all feel similar when squeezed.
- True the Wheel: After correcting a sagging spoke, you will likely need to true the wheel. Remember to alternate between tightening and loosening spokes to maintain even tension throughout the wheel.
- Inspect Your Work: Spin your wheel to ensure it’s not wobbling or rubbing against the brake pads. If it is, further adjustments may be needed.
Consistently checking for and correcting sagging spokes can help maintain your bike’s performance and prevent more serious problems from developing in the future.
Aside from truing the bike wheel, you can also fix your spokes to prevent them from getting damaged again.
Once you’ve found the spokes at fault, you can turn them clockwise. Turn them by a quarter turn and spin the wheel to check your progress.
The wheel does not need to be perfect, but it should be relatively straight and without loose spokes. It should also be free of rubbing the brake pads.
If you do not have a bike wheel truing stand, make sure you have a tool that has a removable indicator.
You can use a screwdriver to turn the nipples. Be sure to turn them in the opposite direction of the spoke nipple.
This way, you won’t cause damage to the spoke or nipples.
The nipples are located on the inside of the spoke rim. You can also use spoke pliers or a spoke wrench to do this work.
Final thoughts
Maintaining your bike’s wheels is an essential part of ensuring its longevity and your safety. Wheel truing, in particular, can seem like a daunting task.
Still, with the right tools and some patience, it’s something that you can learn to do at home.
By understanding the anatomy of your wheel, making small and careful adjustments, and checking your work regularly, you’ll be able to keep your wheels in top shape.
Remember to take your time and work methodically, whether you’re using a truing stand or doing it by eye.
However, if you’re unsure or the wheel appears to have significant damage or problems, don’t hesitate to seek help from a professional.
A well-maintained wheel provides a smooth ride and prevents unnecessary wear on your bike’s other components.
Learning to true your own wheels can be rewarding for bike maintenance, saving you time and money in the long run.
So, grab your spoke wrench and get started!
Happy truing!